
Keitaro
Summary
This guide explains how to integrate Keitaro with DAO.AD for click tracking and conversion tracking.
Before You Begin
- Role: Advertiser.
- Required information:
- Access to a Keitaro tracker
- Estimated time: 5 minutes
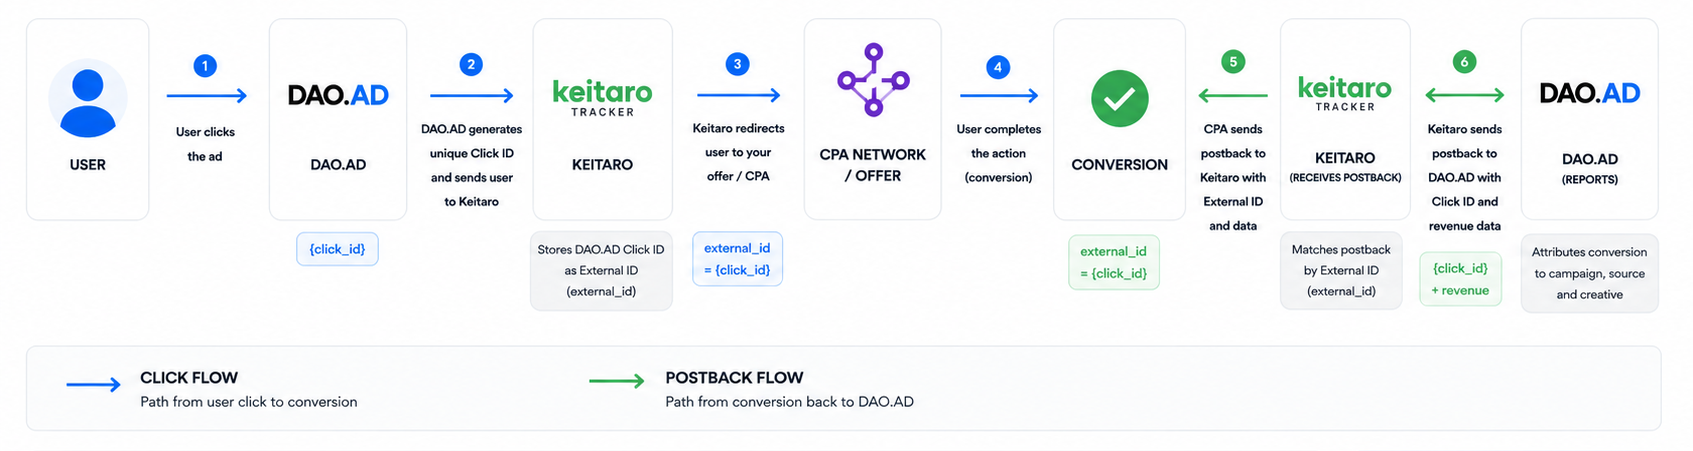
Keitaro Tracking Flow
Steps
- Sign in to Keitaro tracker.
- Open the "Traffic Sources" menu.
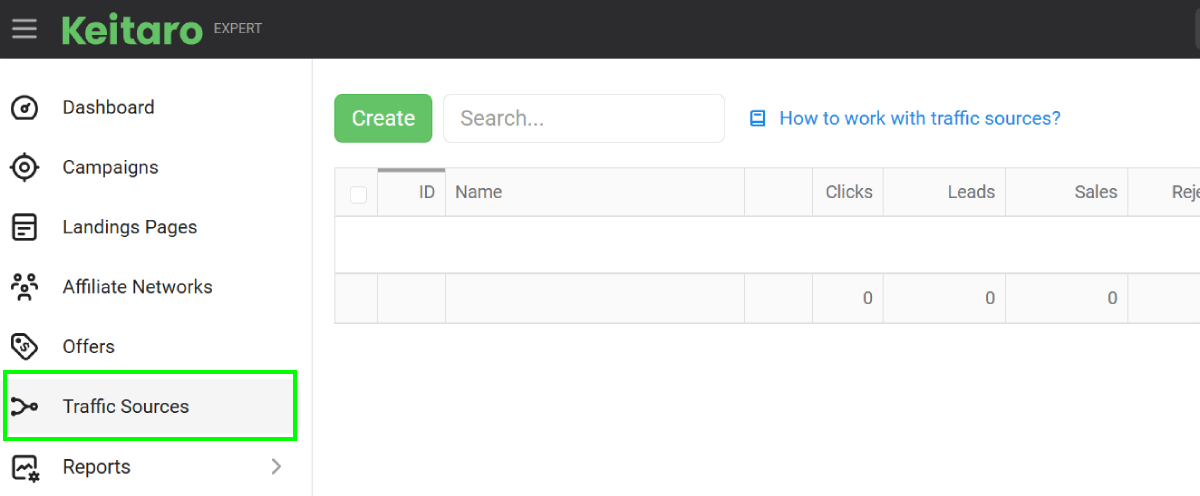
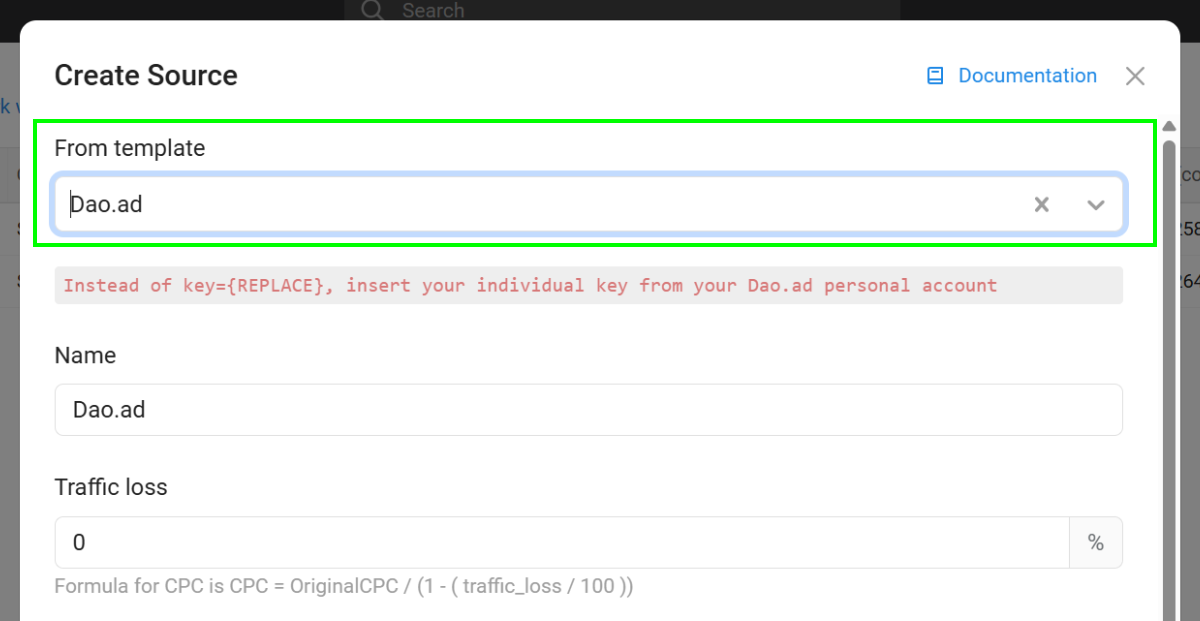
- Click the "Create" button and select the "DAO.AD" template.
- Locate the "S2S Postback" section and click the Edit button.
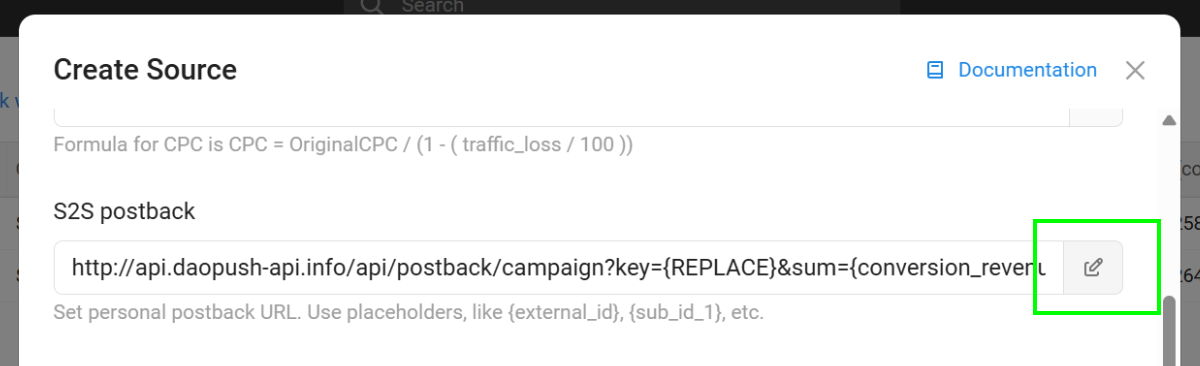
- Configure the postback URL using the URL constructor.
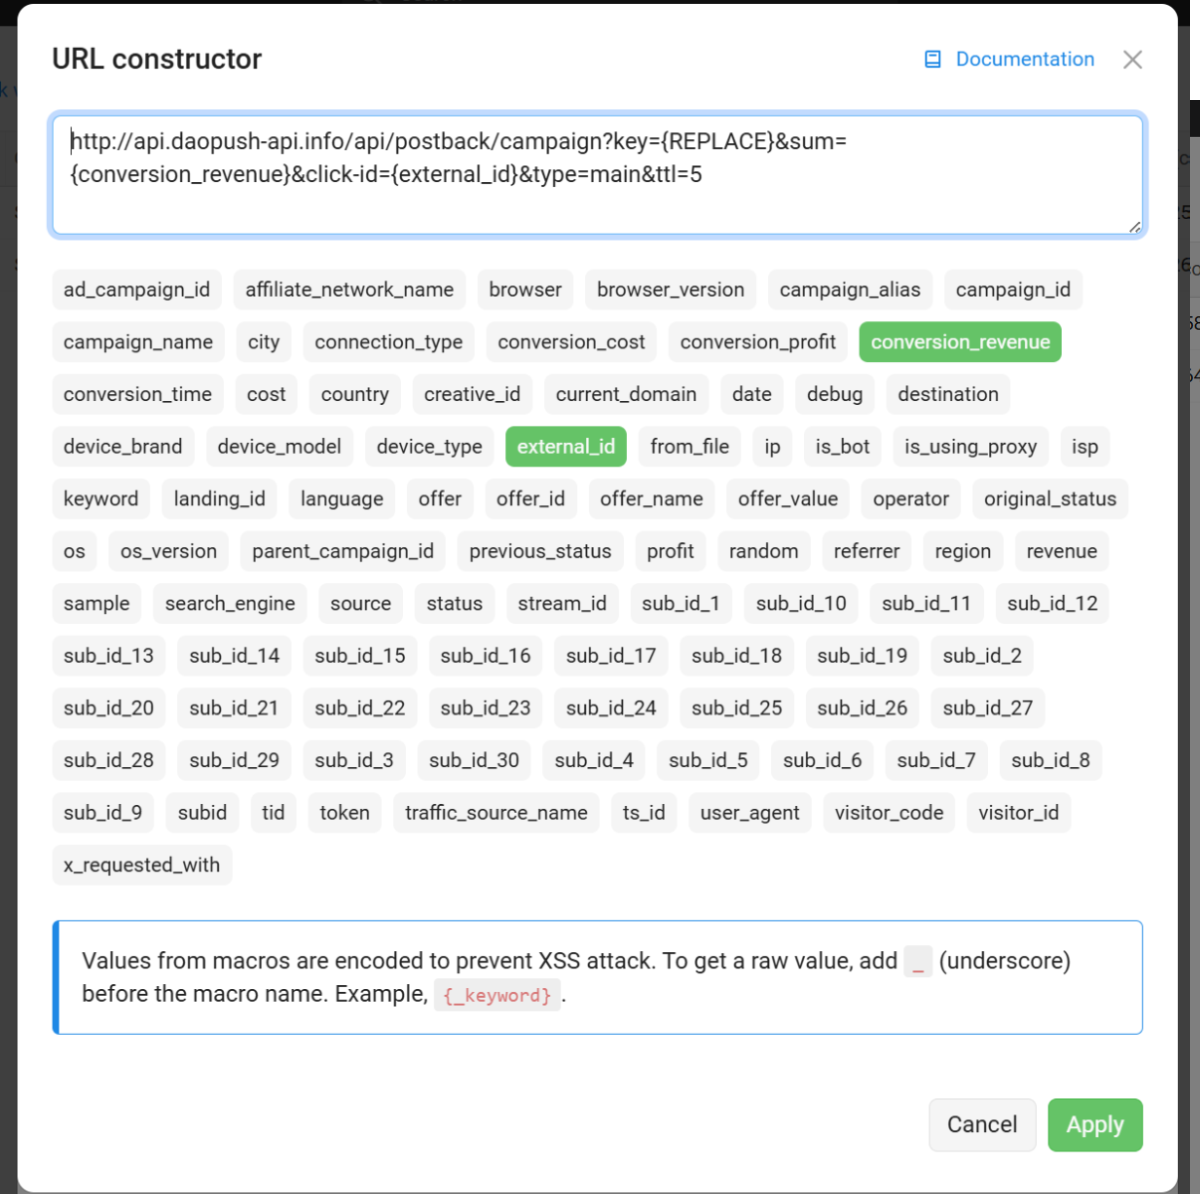
- Replace the API key placeholder with your DAO.AD API key from DAO.AD Profile page and click Apply.
- Verify that all parameters are configured correctly.
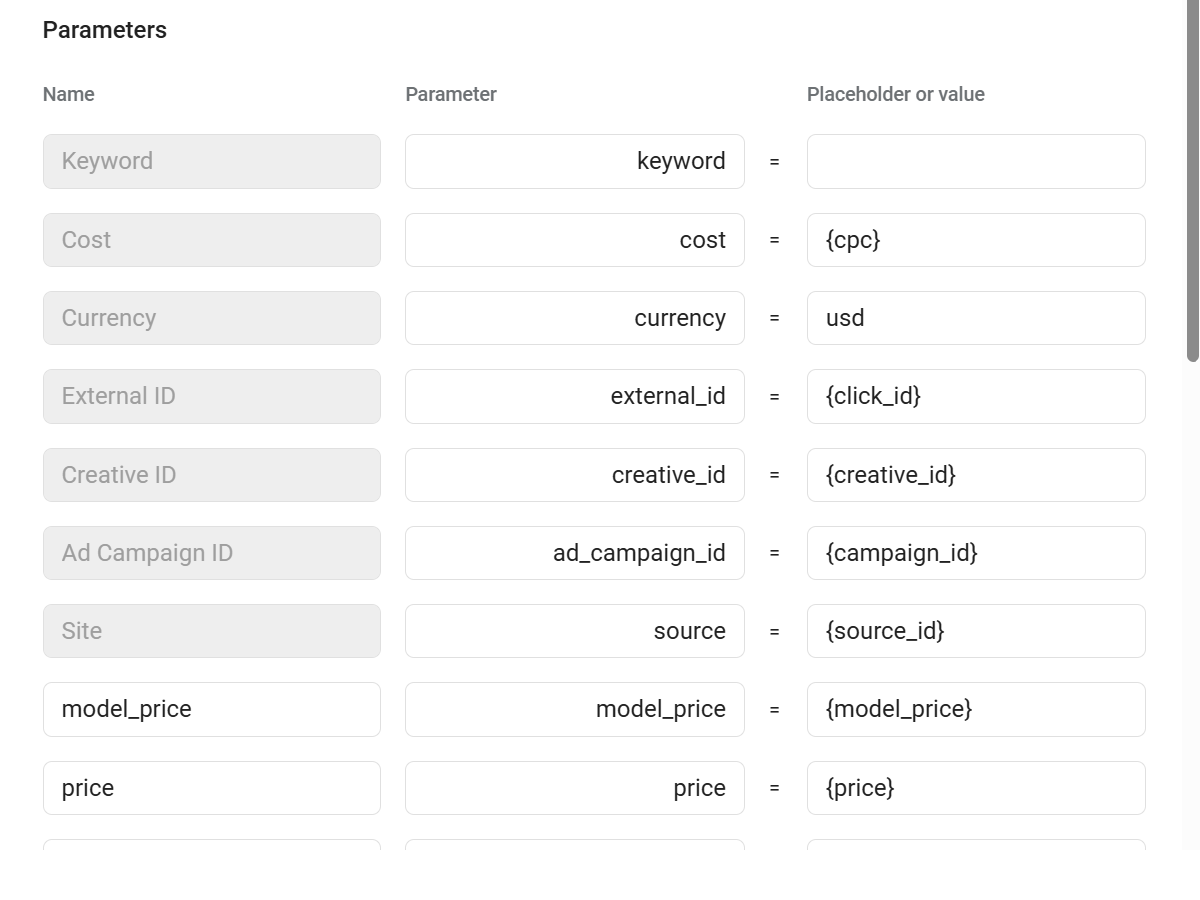
- Save the created traffic source.
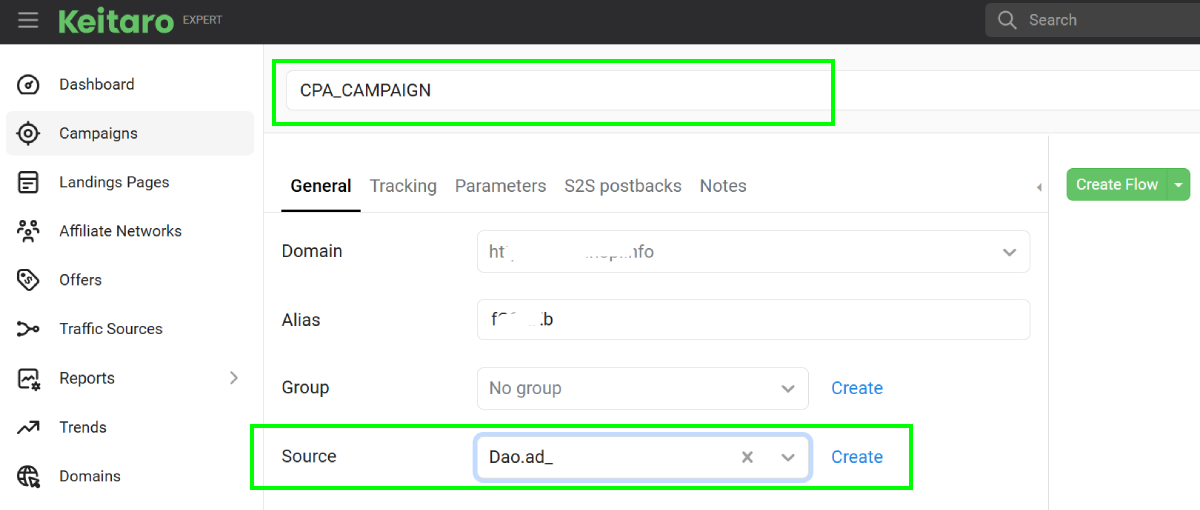
- Go to "Campaigns" menu in Keitaro tracker.
- Create a campaign connected to your CPA network or landing page.
- Select the previously created "DAO.AD" traffic source and save the campaign.
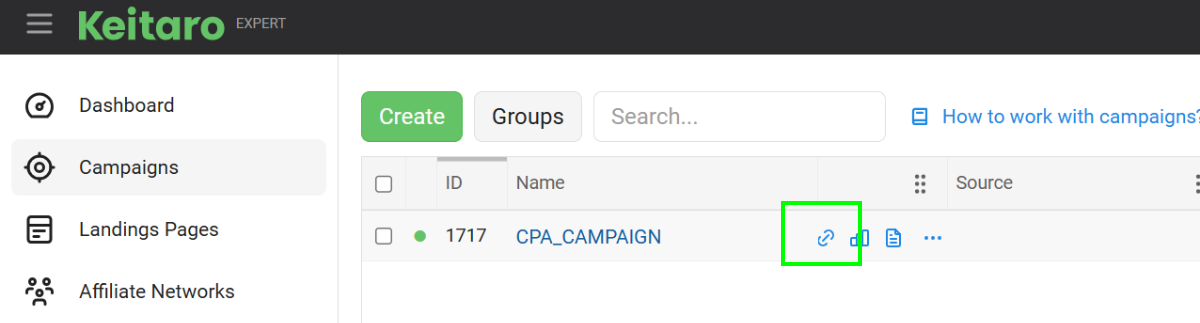
- Copy the campaign URL by clicking the Link icon.
- Paste the campaign URL into the Creative URL field in DAO.AD.
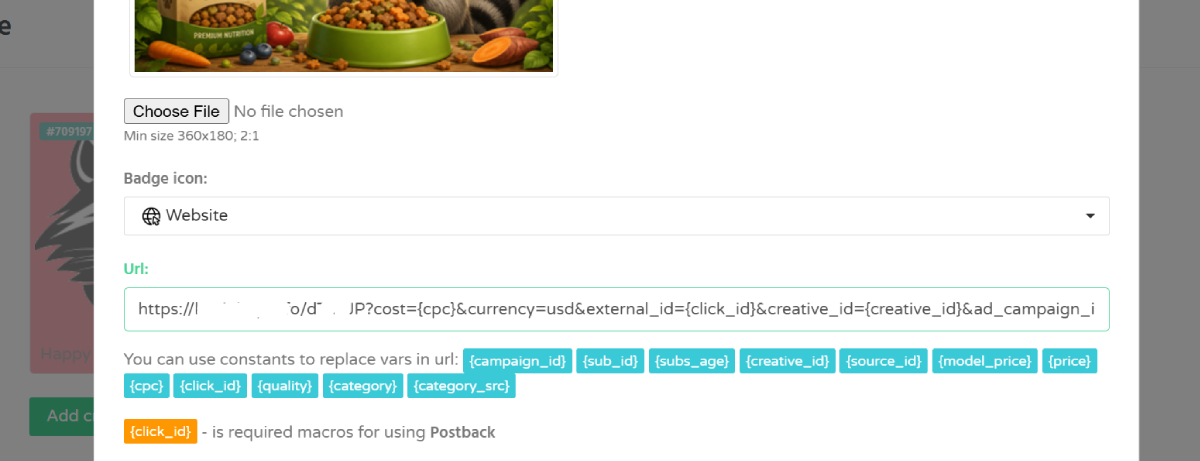
- Save the creative and campaign settings in DAO.AD.
How it works
- DAO.AD sends a click ID to Keitaro.
- Keitaro stores this click ID and passes the user to your offer.
- When a conversion happens, Keitaro sends a postback to DAO.AD with the original click ID and conversion value.
This allows DAO.AD to attribute conversions to the correct traffic source and optimize campaign performance.